Epinova DXP deployment extension for Azure DevOps Part 5 – How to set up a CI/CD pipeline (Classic Strategy, Reset and Hotfix pipelines)
This post will describe how to implement pipelines for what we call the Classic strategy as well as Reset- and Hotfix-pipelines with the help of the Epinova DXP deployment Azure DevOps extension.
This blog post is the fifth and last in a series
- Part 1: Introduction
- Part 2: Branch and release strategies
- Part 3: A closer look at the Epinova DXP deployment extension for Azure DevOps
- Part 4: How to set up a CI/CD pipeline (Prerequisites and Release candidate strategy)
- Part 5: How to set up a CI/CD pipeline (Classic Strategy, Reset and Hotfix pipelines)
This post will describe how to implement pipelines for what we call the Classic strategy as well as Reset- and Hotfix-pipelines with the help of the Epinova DXP deployment extension (the different strategies are described in more details in part 2 of this blog series). We will create the pipelines by using predefined YAML files so it should be as simple as possible.
The Classic Strategy uses a CI/CD pipeline that builds and deploys the master branch to the Integration with options to push this release to the Preproduction and Production environments as well. This blog post assumes that you have already set up the prerequisites from part 4.
Package method
In earlier parts we investigated using different types of packages when deploying the solution. However, with the classic strategy in this example we are only using the NuGet package method.
Implement CI/CD pipeline: Master => Integration => Preproduction => Production
YAML-file
We will start with downloading the YAML pipeline file that you are going to use. You need to download and store this file in your solution. If you don’t have a place to store these already, then I recommend that you create a “pipeline” folder in your solution structure and place the YAML file in there. Start with downloading a predefined yaml file for this pipeline.
Setup the pipelines in Azure DevOps
Now it is time to create the pipelines in Azure DevOps.
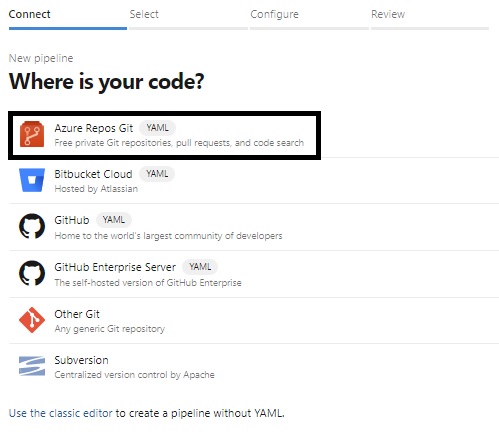
- Log in to you Azure DevOps account and go to your project.
- Select Pipelines in the project menu.
- Click on the “Create pipeline” button
- Select the repo type. In my case we have it in the Azure Repos Git.
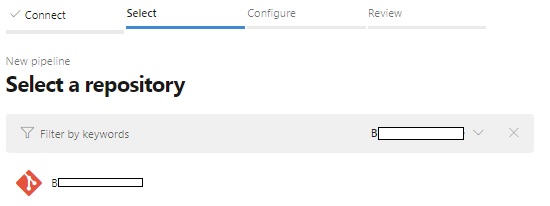
- Select your repo.
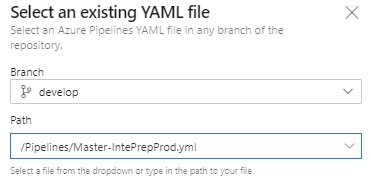
- Configure your pipeline. Select the “Existing Azure Pipelines YAML file” in the bottom.

- Select the YAML file that you want to create a pipeline from.
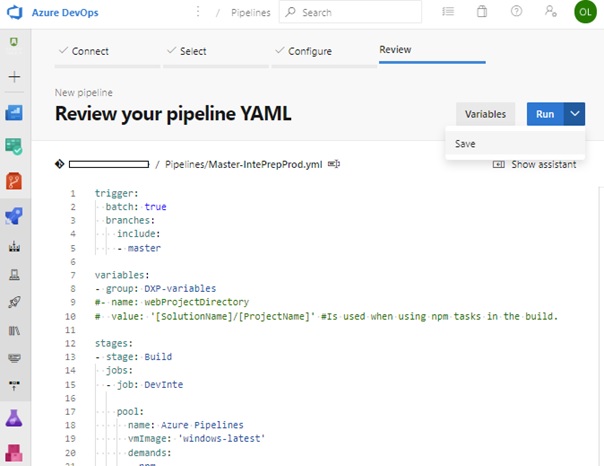
- Save the pipeline.
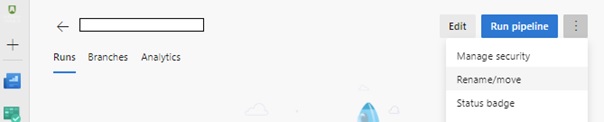
- Rename the pipeline. At present date Microsoft has not implemented any way to specify a default name for the pipelines created from YAML and you will get your project name as the default name of the pipeline. To rename the pipeline you go to this view.
 Let’s name this pipeline “Master-IntePrepProd”.
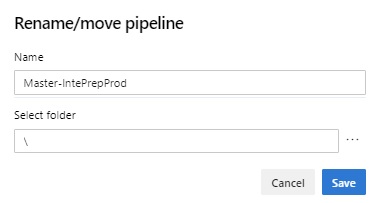
- You can now test running the pipeline.
- Now when you start the pipeline manually you can select what branch that should be build and released but the YAML file is also configured to trigger when someone does a merge or commit to the master branch.
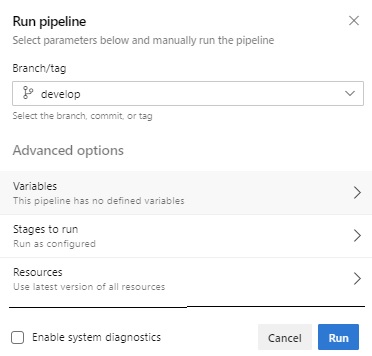
- If everything is working as it should the result would be the following:
Implementing a Reset pipeline
Now it is time to setup the reset pipeline – that adds the ability to reset any environment(s) in case of problems. This pipeline will only be triggered manually so we won’t add any triggers to start it. You start this manually when a slot needs to get restored or something wrong happened with a deploy and you want to reset the deploy.
YAML-file
Download and add the following yaml file to your solutions pipelines folder. Set up a new pipeline as described previously in this blog post – and name it Reset-IntPrepProd.
Example of usage
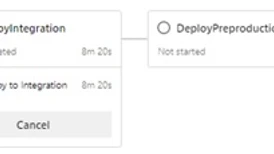
I got a problem with a deploy to integration where the slot took a very long time to deploy to where I eventually ended up in the situation where the deploy script timed out (default 30 min).
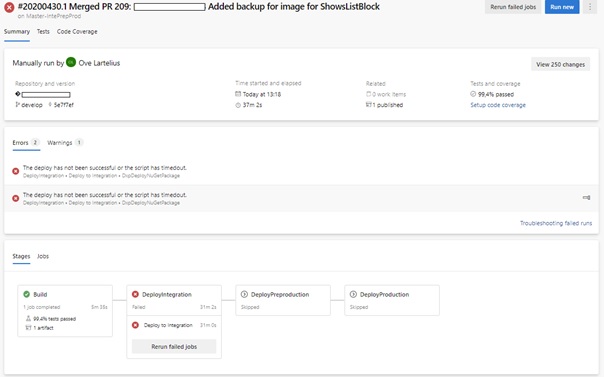
To solve this, I ran the Reset-IntePrepProd pipeline which resulted in the pipeline resetting the Integration environment.
![]()
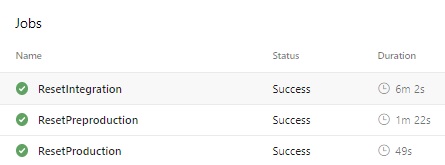
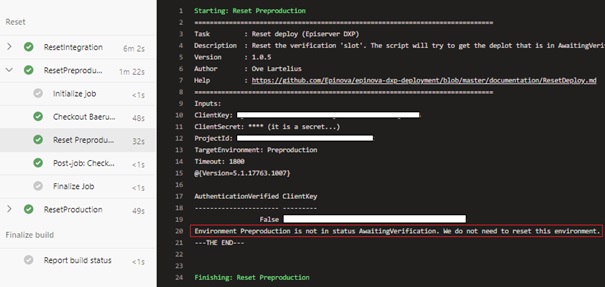
If we look at the ResetIntegration step a little bit closer, we can see that if reset the Integration environment.

When we look at the Preproduction or Production steps, nothing happened.
Outro
We have now looked at how to set up a CI/CD pipeline for the master branch to deploy to the DXP environments and, how to set up a reset pipeline that can be used to reset erroneous deploys/situations. I hope that this help a lot of developers that just want something easy to start with to be able to start deploying your solutions to Episerver DXP.
I noticed that Episerver have recently released some new functionality to the Episerver DXP API and we will look into adding support for these as soon as possible.
For the latest documentation and guides please visit the repo on GitHub. Where all code, documentation and YAML files etc. exist.
https://github.com/Epinova/epinova-dxp-deployment
https://marketplace.visualstudio.com/items?itemName=epinova-sweden.epinova-dxp-deploy-extension

We would like to hear what you think about the blog post