Epinova DXP deployment extension for Azure DevOps Part 3 – A closer look at the Epinova DXP deployment extension for Azure DevOps
This post will describe the tasks in the Epinova DXP Deployment extension (Beta). How to use the tasks and how to install the extension to your Azure DevOps organization.

This blog post is the third in a series
- Part 1: Introduction
- Part 2: Branch and release strategies
- Part 3: A closer look at the Epinova DXP deployment extension for Azure DevOps
- Part 4: How to set up a CI/CD pipeline (Prerequisites and Release candidate strategy)
- Part 5: How to set up a CI/CD pipeline (Classic Strategy, Reset and Hotfix pipelines)
The extension (Epinova DXP deployment)
Epinova DXP deployment extension for Azure DevOps currently includes 6 tasks that should make it simple and fast to setup a deployment/release pipeline against Episerver DXP. In this blog post – we’ll take a look at these tasks as well on how to install this extension to Azure DevOps.
Note: In this blogpost we use images with classic Azure tasks for easier reading - but we normally use YAML. More information about YAML examples will come in upcoming parts and exist in the GitHub repository. https://github.com/Epinova/epinova-dxp-deployment
Extension tasks
Let’s have a look on the different tasks and investigate what they are doing.
Deploy NuGet package

This task grabs the NuGet package(s) that your build pipeline has created and uploads them to Episerver DXP. After a successful upload it will start to deploy the NuGet package(s) to the specified environment. When a deploy is started to an environment in Episerver DXP it creates a slot per application where it is deployed first. These slot(s) can then be verified before it is fully deployed to the environment. The task will end when the slot is up and running, so that you can verify the slot before continuing the deployment process if you want.
Note: Episerver DXP requires one package for the main web site and one for the Commerce Manager – so depending if you’re deploying the Commerce Manager or not, you’d use one or two packages. The task will search for “*.cms.*.nupkg” and “*.commerce.*.nupkg” and upload these files to DXP.
YAML example
- task: DxpDeployNuGetPackage@1
inputs:
ClientKey: '$(ClientKey)'
ClientSecret: '$(ClientSecret)'
ProjectId: '$(DXP.ProjectId)'
DropPath: '$(Pipeline.Workspace)\drop'
TargetEnvironment: 'Preproduction'
UseMaintenancePage: false
Timeout: 1800
Smoke test and if fail reset

This task is used when a deployment is in verification mode: in other words, when your code has been deployed to a slot and is waiting for verification (AwaitingVerification). For this, we want to have an automatic function that checks that the site is working as expected. This task lets you specify as many URLs as you want and the task will do a web request to each of these URLs to verify that the slot works as expected. As long as the result it a HTTP status 200 (Ok) from the request it will continue but otherwise it will automatically reset the deployment and not continue the deployment once the environment has been reset.
Hint: If your site is secured so that you need to login to see the site and you’re using forms authentication - you can add “login?ReturnUrl=%2f” in the end of the URL. At least you then know that you don't get internal server error or something. You could also do a request to a page that does some testing and only returns a HTTP status 200 if all tests pass.
YAML example
- task: DxpSmokeTestIfFailReset@1
inputs:
ClientKey: '$(ClientKey)'
ClientSecret: '$(ClientSecret)'
ProjectId: '$(DXP.ProjectId)'
TargetEnvironment: 'Preproduction'
Urls: '$(Preproduction.SlotUrl)$(Preproduction.UrlSuffix)'
SleepBeforeStart: 20
Timeout: 1800
Complete deploy

Regardless if you use the smoke test task or not - this task will check if the specified environment is in the status AwaitingVerification and if so, it will complete the deployment.
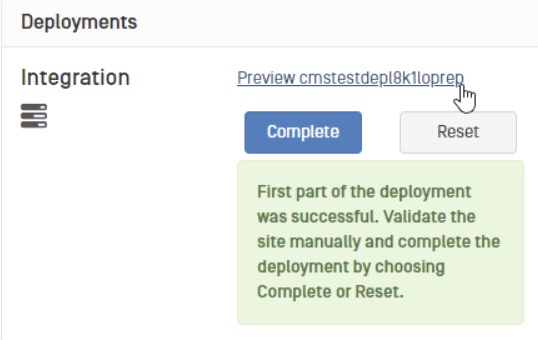
This means that it will switch the deployment and the main slot for the given environment. E.g. mysiteinte-slot.* => mysiteinte.*
When this task has been successfully run you have deployed new code to the specified environment.
YAML example
- task: DxpCompleteDeploy@1
inputs:
ClientKey: '$(ClientKey)'
ClientSecret: '$(ClientSecret)'
ProjectId: '$(DXP.ProjectId)'
TargetEnvironment: 'Preproduction'
Timeout: 1800
Deploy to

This task “moves” the deployment from one environment to another, for example from Preproduction to Production. It will still put the website into a slot for verification, as the “Deploy NuGet package” task. We recommend that you use the Smoke test and if fail reset task after this is finished.
This task is equal to the “Deploy to” button in the DXP portal (aka paasportal).

YAML example
- task: DxpDeployTo@1
inputs:
ClientKey: '$(ClientKey)'
ClientSecret: '$(ClientSecret)'
ProjectId: '$(DXP.ProjectId)'
SourceEnvironment: 'Preproduction'
TargetEnvironment: 'Production'
SourceApp: 'cms'
UseMaintenancePage: false
Timeout: 1800
Reset deploy

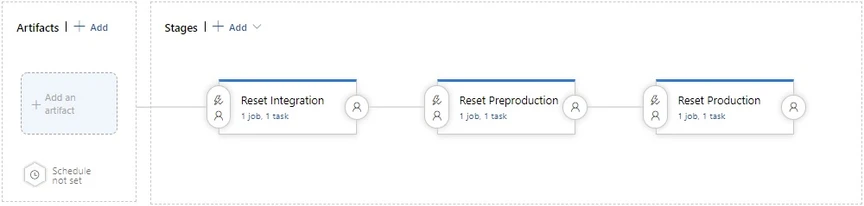
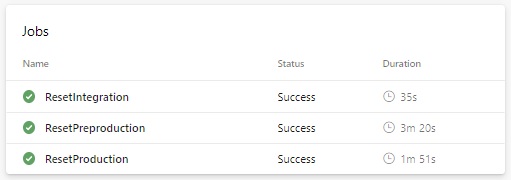
Sometimes a deploy does not pass testing and you need to reset an environment. The Reset deploy task will help you reset an environment. It will check the specified environment and if it is in the AwaitingVerification status, the task will reset (rollback) the deployment. You can always run this task against all the environments as it will only reset environments that have the status AwaitingVerification. This task is mostly used in the a Reset pipeline.
YAML example
- task: DxpResetDeploy@1
displayName: 'Reset Preproduction'
inputs:
ClientKey: '$(ClientKey)'
ClientSecret: '$(ClientSecret)'
ProjectId: '$(DXP.ProjectId)'
TargetEnvironment: 'Preproduction'
Timeout: 1800
Export DB

Just a little while ago Episerver added the possibility to export database from your environments. This task makes it possible to specify the environment and also what database (cms or commerce) that you want to export. When the export is finished you will get a URL where you can download the exported bacpac file. There is also a variable: DbExportDownloadLink, that is set with the information about the download URL. This makes it possible for you to add an additional task in your pipeline where you can send this information via email to you or some other clever solution by using “$env:DbExportDownloadLink”.
How to combine them?
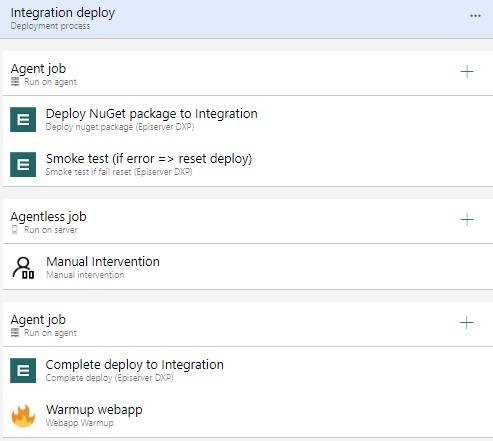
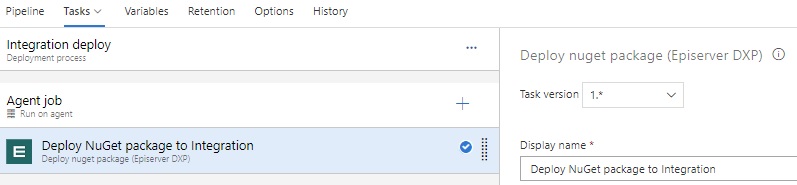
We want to deploy NuGet package(s) that is built from the developer branch and deploy this to the Integration environment. First, we start with adding the task Deploy NuGet package so that it starts uploading the NuGet package. This is how it could look like:
If you want to move the website from two environments – for instance Preproduction to Production, it could look like this:
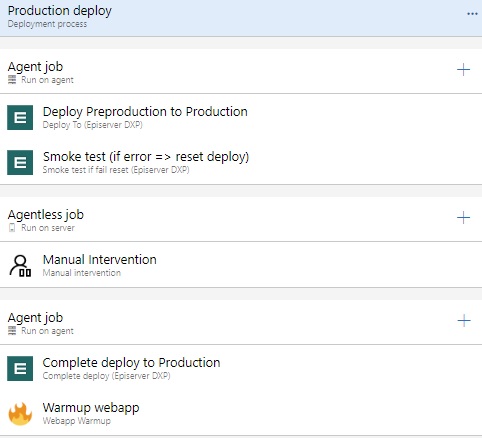
The difference between the above cases is the first step. If you need to upload a NuGet package you can use Deploy NuGet package. And if you want to move the code from one environment to another you use Deploy to task. Otherwise the Smoke test, and Complete deploy are the same.
Learnings
Since our recommended strategy is to deploy a build from the developer branch to the Episerver DXP integration environment and either a release or the master branch to Preproduction we want a fast deployment pipeline to integration since that’s the branch that will have most frequent changes. Unfortunately, Episerver DXP is not that fast to deploy to right now. Even a fast deploy with a NuGet package to any of the environments on DXP takes a couple of minutes. If you have a week server setup or your code is doing things that takes extra time on startup it can take a long time to deploy (we’ve seen time up to 40 minutes when deploying both CMS and Commerce). To be able to do quick deploys to the Integration environment, we recommend to use a regular WebPackage deploy via the task “Azure App Service Deploy” to the Integration environment. Then you can create NuGet packages that are deployed to the Preproduction environment where you can also push this to the Production environment.
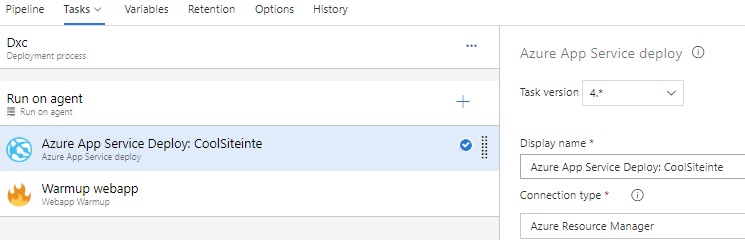
The reason that we use different package formats is that the Episerver DXP API want to deploy a NuGet package while the “Azure App Service Deploy” wants to deploy a WebPackage. The other difference is when we deploy to integration, we do not use the integration-slot. It just deploys the code to the integration server directly. When using Episerver DXP API it deploys first to the [environment]-slot. And if that is working as expected it can switch slots with the public slot for the given environment.
Install “Epinova DXP deployment” extension in Azure DevOps
Microsoft has general information on how to install an Azure DevOps extension: https://learn.microsoft.com/en-us/azure/devops/marketplace/install-extension?view=azure-devops&tabs=browser
The extension you want to install can be found on the VisualStudio marketplace: https://marketplace.visualstudio.com/items?itemName=epinova-sweden.epinova-dxp-deploy-extension
In the end of that page, there also a link to how to manage extension permission. https://learn.microsoft.com/en-us/azure/devops/marketplace/grant-permissions?view=azure-devops
In short, the first step is just to install the extension. Step 2 is to make sure that your projects in your organization can start using it. When you are done, it should look something like this:

Congratulation! You can now start to use the task in the release pipelines.
Outro
Now we have a better overview what tasks that the extension contains and what they are used for. Next up we are going to go through how to setup pipelines for CI/CD with YAML.
For the latest documentation and guides please visit the repo on GitHub. Where all code, documentation and YAML files etc. exist.
- https://github.com/Epinova/epinova-dxp-deployment
- https://marketplace.visualstudio.com/items?itemName=epinova-sweden.epinova-dxp-deploy-extension
Go to Part 4: How to set up a CI/CD pipeline (Prerequisites and Release candidate strategy)

We would like to hear what you think about the blog post