Setup new/existing website in DXP integration
EPiCloud v1.3 has been released! You can now upload blobs and database to DXP!

There are cases when you want to move an existing Optimizely website to DXP. It could be existing website hosted somewhere else or you already started development and now it is time to get the website up and running on your integration environment in Optimizely DXP.
Before EPiCloud v1.3.0 you had to contact Optimizely support and send them your database and blob files to restore it in the integration environment. But now with EPiCloud v1.3.0 they have introduced a new flag. “Writable”. It will give you the option to only list containers that are writable. Or order a SAS URL that give you write permissions on writable containers.
You have also the possibility to upload a bacpac file in the same way you upload a nupkg with the website code. So, if I cut to the point. You can now setup a website in integration environment all by yourself without contact Optimizely support. That is very nice. Let´s have a look how I deployed an Alloy website code, database and blob(s) to an empty Optimizely DXP integration environment.
And for those that don't know what EpiCloud is: EPiCloud is the PowerShell module that is used to deploy to Optimizely DXP with code. Epinova DXP extension for Azure DevOps is using this in the background to be able to deploy and do other fun stuff against Optimizely DXP by using code.
Prerequisites/Preparation
We need to do some preparation to make this work. Some of the steps may not be needed for your case. Just jump over these and move on.
Access to PAAS
You should have access to an existing project in Optimizely PAAS portal. If not, you will not be able to test this functionality.
PowerShellGet
Since PowerShell Gallery is involved, you need to have PowerShellGet installed. Instructions how to install PowerShellGet (https://learn.microsoft.com/en-us/powershell/gallery/powershellget/install-powershellget?view=powershellget-3.x&viewFallbackFrom=powershell-7.1).
Microsoft Azure Storage Explorer
We will use Microsoft Azure Storage Explorer to upload blobs in this example, so you need to download and install Microsoft Azure Storage Explorer. https://azure.microsoft.com/en-us/products/storage/storage-explorer
Download example - PowerShell scripts
I have created some example files that we will use during these steps. Download ZIP SetupDbAndBlobs_v1.zip and extract in c:\temp\newwebsite. If you want to extract somewhere else it is of course ok, but I will refer to “c:\temp\newwebsite” in the following examples.
EPiCloud – version
It could be that you need to uninstall the old versions of EPiCloud to make this work. I had problem to use the new version, so I needed to uninstall all other versions before been able to use the new functionality.
You can use the script EPiCloudVersions.ps1 in the examples to help out with this.
Prep params.ps1
Go to your https://paasportal.episerver.net/ PAAS project and create/get the API key, secret and project id. And set these values in the correct parameters in the file c:\temp\newwebsite\params.ps1

Set-StrictMode -Version Latest
Set-ExecutionPolicy -Scope CurrentUser Unrestricted
$clientKey = "cxxxx2Q"
$clientSecret = "xxxxEKt3m"
$projectId = "67c3fe71-fa13-4fb6-84c1-b18c0196336a"
$environment = "Integration"
Blobs to upload
To upload your blobs to DXP you need gather your blobs for the location that you have them stored at the moment. That could be in you App_Data folder or in on an on-prem disc or in some own hosted Azure storage account. Gather/download/copy your blobs to example c:\temp\newwebsite\mysitemedia. When you are done you should have one or many guid-named folders in the mysitemedia folder like this:

There will be one blob folder in the example in the ZIP file if you don't want to upload all your files right now.
Database to upload
Make a bacpac export of your database. How you do that is out of scope in this blogpost. But when you are done your bacpac file should follow the naming convention “*cms|commerce*sqldb*.bacpac” and be placed in the newwebsitefolder like “c:\temp\newwebsite\alloy.cms.sqldb.2.bacpac”.
https://docs.developers.optimizely.com/digital-experience-platform/docs/code-package-format
Application to upload
You should create a NuGet package of your website and placed it the newwebsitefolder like “c:\temp\newwebsite\Alloy.Cms.App.0.0.0.9.nupkg”. How you make a NuGet package of your website is out of scope for this blogpost. Also make sure to follow the naming convention “*cms|commerce*app*.nupkg”.
https://docs.developers.optimizely.com/digital-experience-platform/docs/code-package-format
All set
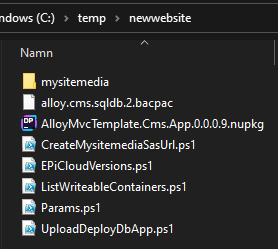
Now you should have gathered all the things needed to setup a new website to your new Optimizely DXP environment. My newwebsite folder looks like this:

We will now do this in 2 bigger steps. First, we will upload the blobs and second, upload and deploy NuGet package and database.
Blobs
To be able to upload blobs we need to get information about the name of the container that we will upload the blobs to. In earlier versions of EPiCloud the method “Get-EpiStorageContainer” listed all the containers. That means that log containers and others were listed as well.
Now when you can specify a new flag with the name “Writable”, method will be able to just list containers that you may have access to write to. Since you will never be able to write to any of the log containers for example, they will not show up in result of flag “Writable” is true.
First step is to check which container in Optimizely DXP that we can upload these blobs to. Execute PowerShell script – ListWritableContainers.ps1
Example: .\ListWritableContainers.ps1
Result example:
PS C:\temp\newwebsite>.\ListWritableContainers.ps1
EPiCloud: @{Version=1.3.0}
Found following storage containers that are writable:
{
mysitemedia
}
PS C:\temp\newwebsite>
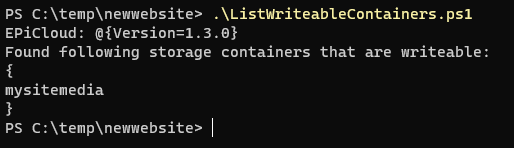
In the result we can see that we have one writable container with the name “mysitemedia”. That is a very common name for the default container name that handle blobs for Optimizely CMS blobs. With this information we want to get a SAS URL to be able to upload our blob files to this “mysitemedia” container. Let us execute next script to create a SAS token that will give us access to upload blobs.
Before EPiCloud v1.3 you could only get read and list access to containers. So, what we can do now is using the “Writable” flag again to ask for “write” permission to the “mysitemedia” container. That is how we will be able to upload the blobs to the container.
Note: If you get another container name then “mysitemedia”. Then you need to change that parameter (“$storageContainer”) in the next script. Execute PowerShell script – CreateMysitemediaSasUrl.ps1
Example: .\CreateMysitemediaSasUrl.ps1
Result example:
PS C:\temp\newwebsite>.\CreateMysitemediaSasUrl.ps1
SAS link info:
{
Environment: Integration
Container: mysitemedia
SAS link: https://xxxx0xmstrxxxxxinte.blob.core.windows.net/mysitemedia?sv=2023-01-03&se=2023-12-05T00%3A12%3A11Z&sr=c&sp=rwl&sig=FWwbIG46jwhvHUKrIa%2BcNXz8T8dslomSwyGRR%2B0LU9M%3D
Expires: 12/05/2023 00:12:11
}
PS C:\temp\newwebsite>

In the result we now got the SAS link that can be used to get access and upload the blobs. Copy the link so that we use it to connect to the container.
You can see in the SAS token that “sp=rwl”. That means that permission is “read, write, list”. If you want to know more about SAS tokens, I recommend you have a look at “Demystifying SAS token basics”. https://www.c-sharpcorner.com/article/demystifying-sas-token-basics/
Upload blobs
I will do this the easy way to upload the blobs by using Microsoft Azure Storage Explorer. You can do this with power shell script or other ways as well but right now we will do it this way.
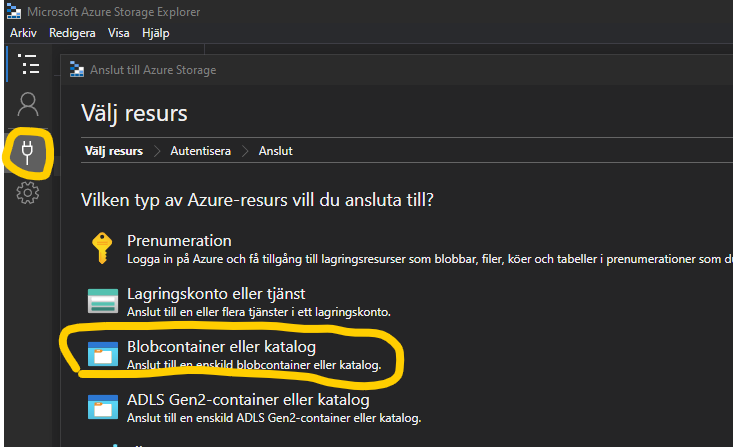
Open Microsoft Azure Storage Explorer and click on the connect icon and select “Blob containers and folders”. (Sorry that I have a Swedish version☹ )
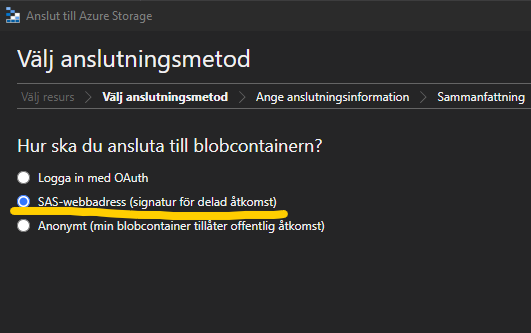
Select SAS-token and click on the Next button
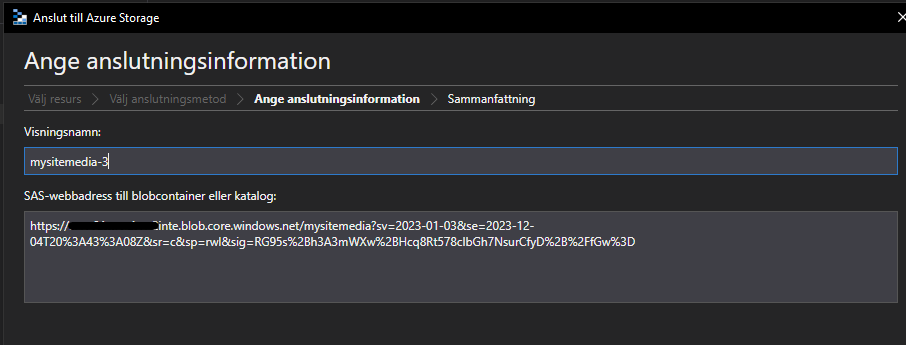
Paste your SAS token into the textarea for your SAS Token and click “Next”.
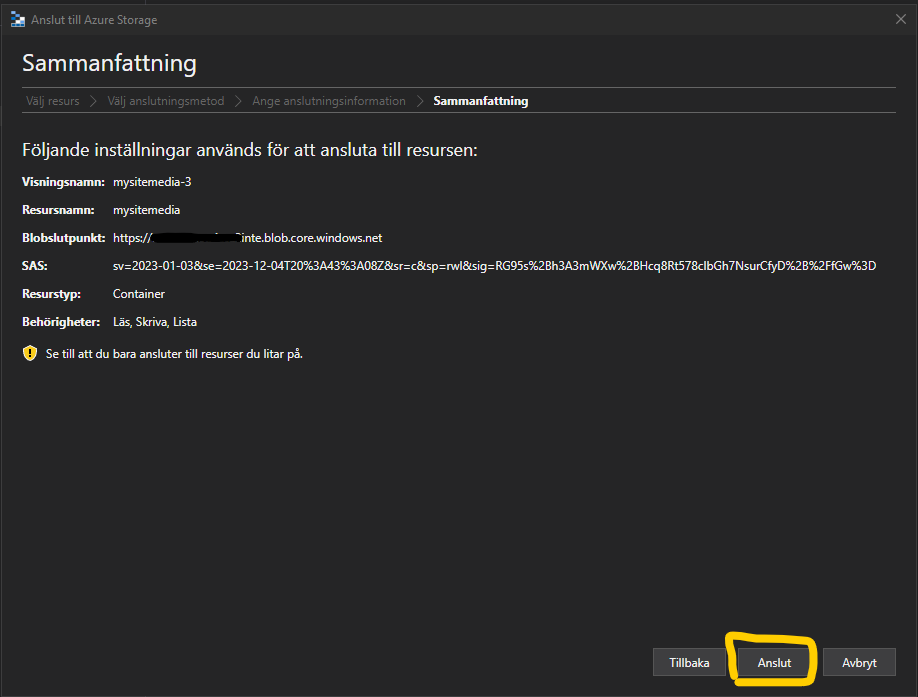
And approve the summery with click on “Connect”.
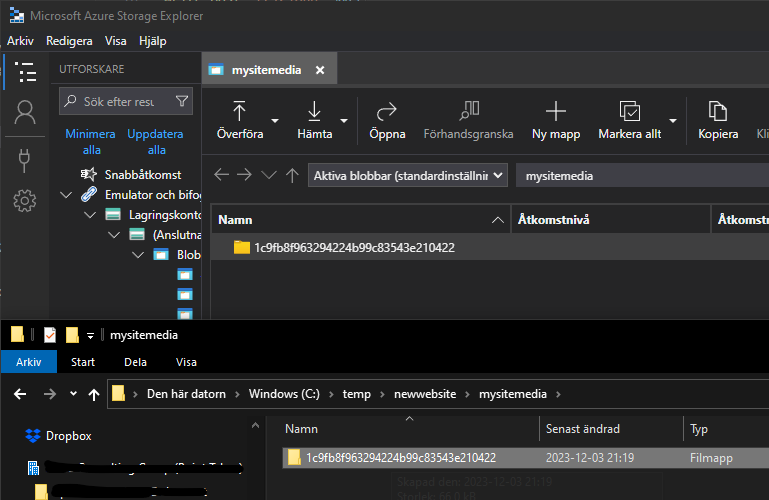
Now you can just drag and drop folders from your local file explorer into the mysitemedia container in Microsoft Azure Storage Explorer and they will be uploaded to the Optimizely DXP blob container.
So right now, I have uploaded all blobs to the Optimizely DXP integration storage account. Let us move on to the next step that is to upload and restore the database and code.
Deploy application and database
So the files I gathered for database and application is “alloy.cms.sqldb.2.bacpac” and “AlloyMvcTemplate.Cms.App.0.0.0.9.nupkg”.
So now we want to upload the bacpac and nupkg files and deploy them to the integration environment. We will use a direct deploy so we don't need to complete the deploy by swapping slot.
Update the file parameters in “c:\temp\newwebsite\UploadDeployDbApp.ps1” and let us start deployment. Execute PowerShell script – UploadDeployDbApp.ps1
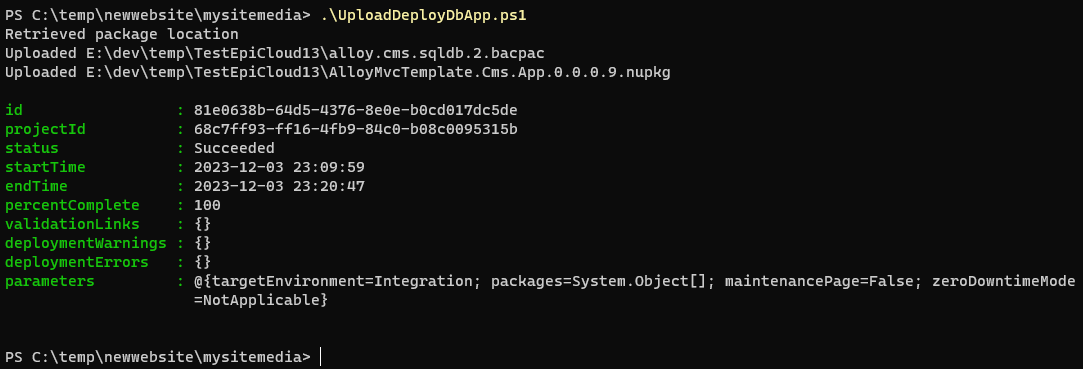
Example: .\UploadDeployDbApp.ps1

Result example:
Retrieved package location
Uploaded E:\dev\temp\TestEpiCloud13\alloy.cms.sqldb.2.bacpac
Uploaded E:\dev\temp\TestEpiCloud13\AlloyMvcTemplate.Cms.App.0.0.0.9.nupkg
Deployment running against Integration... [InProgress ]
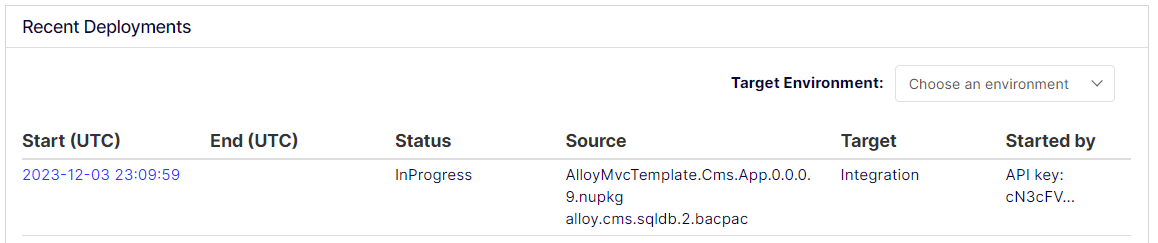
If we jump into the PAAS portal you can see that both app and db is deploying.
When the deployment is done you get the result of the deployment.
And now I can go in and have a look on the website and see if everything is setup as expected.
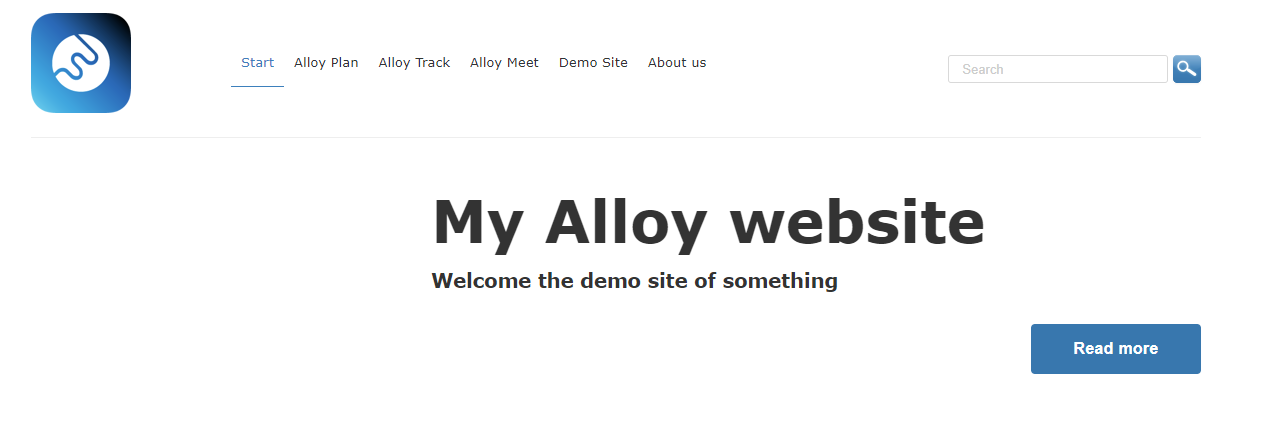
Ta-da!!
We have with this example setup a Optimizely CMS website with blobs, database and code in the Optimizely DXP integration environment without involving any other persons. I like that! This will be very useful, and I think that there will pop up some new features soon that use this new functionality in EPiCloud v1.3.
I hope that this was helpful for you to get little better understanding what you can do with the new version of EPiCloud.
Ove and out!

Vi vill gärna höra vad du tycker om inlägget