How to create an admin user I Optimizely CMS – with Episerver CLI
In this blog post I’ll show how to create an admin user for Optimizely CMS in a new environment where you don’t have access to the admin interface.
Context
I have spined up a lot of Optimizely CMS sites the last couple of months, for instance a few customer projects where the customer is either upgrading or rebuilding their site on Optimizely CMS 12. For the rebuilds, they usually start with a new empty database that we set up in Windows Azure. As part of getting started I need to set up a login account to the newly setup website. Since I usually forget how this is done and need to Google it, I decided to blog about how so I can have this as a reference for myself and hopefully also help others.
Prerequisites
You need to have PowerShell installed as well as a code editor like Visual Studio Code.
In the examples we will use Visual Studio Code “code file.json” that means open Visual Studio Code and show the content of file.json.
Optimizely Data CLI
There’s an tool called Optimizely CLI that can be installed and used to create CMS databases and users. This is very handy when your code does not contain logic to create a user for a new and empty database (services.AddAdminUserRegistration()). With a command prompt and a reusable code snippet I will create a user in PowerShell.
Note: If you have added “AddAdminUserRegistration” you can use https://yoursite.com/util/register.
Note: There is a certain naming confusion regarding the CLI tool. The technical package name is Episerver.Net.CLI but it’s referred to as the Optimizely Data CLI tool in Optimizely’s documentation. Given their rebranding this makes sense – but to confuse things even further there’s also a totally separate open source tool that’s named Optimizely CLI that works against the Optimizely experimentation platform.
Example
The following code is the example I always use as default. I will break it down and come up with an example how you can set it up on your computer. And reuse this in a simple way.
dotnet-episerver add-admin-user -u adminusername -e adminemail@example.com -p P@ssw0rd!! -c EPiServerDB c:\dev\CreateCmsAdminUser\Site.csproj
Install CLI
If this is the first time you use the Optimizely Data CLI you need to install it. Open up PowerShell and execute the following:
dotnet tool install EPiServer.Net.Cli --global --add-source https://nuget.optimizely.com/feed/packages.svc/

If you already have this installed you can always update the Optimizely Data CLI:
dotnet tool update EPiServer.Net.Cli --global --add-source https://nuget.optimizely.com/feed/packages.svc/
Shortly how it works
When you execute the following code:
dotnet-episerver add-admin-user -u adminusername -e adminemail@example.com -p P@ssw0rd!! -c EPiServerDB c:\dev\CreateCmsAdminUser\Site.csproj
This script will detect your Optimizely database connection from the specified project file and create a new user with the following attributes:
- Username: “adminusername”
- Email: “adminemail@example.com”
- Password: “P@ssw0rd”.
Creating a foundation to work against any database
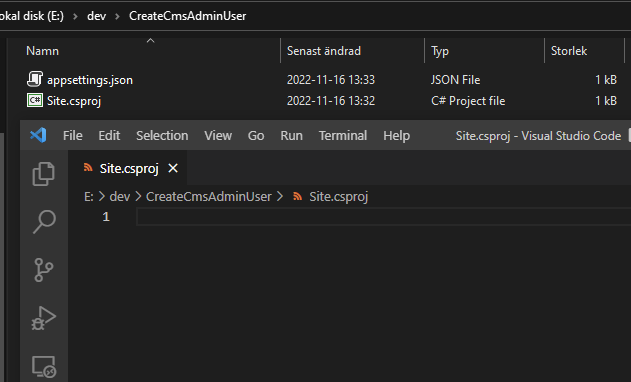
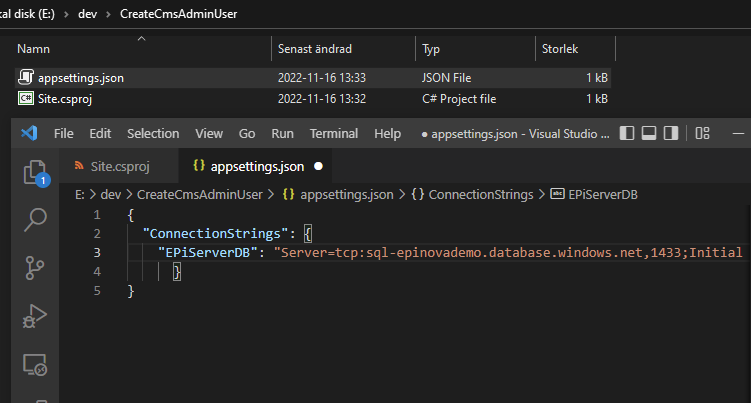
If you are in a situation where you are frequently being asked to create admin users in different projects or environments becomes a bit trickier. I started to experiment on how the tool worked to see if I could find a good generic solution and figured out that I could remove everything in the project folder except for the csproj-file and appSettings.json. The csproj-file could be totally empty – the tool does not actually read anything from the project file, but it must exist on the specified location or otherwise you will get an error. The appSettings.json can contain just the connectionstring with the name that you specified in the script (usually EpiserverDB).
Site.csproj example:

AppSettings.Json example:

With this knowledge at hand, I can very quickly have a folder where I just alter the database connection to be able to execute scripts against different databases.
In my case I have all my local repos in c:\dev. I create a folder with the name “CreateCmsAdminUser”
md c:\dev\CreateCmsAdminUser
cd c:\dev\CreateCmsAdminUser
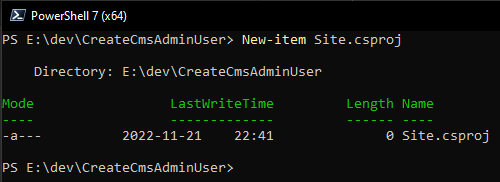
Create an empty *.csproj file.
New-Item Site.csproj

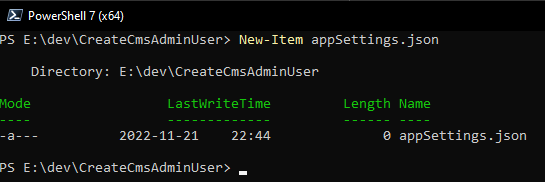
Create an empty appSettings.json file.
New-Item appSettings.Json

Open the appSettings.json with Visual Studio Code and add the following JSON:
code appSettings.json
{
     "ConnectionStrings": {
         "EPiServerDB": "Server=tcp:sql-server,1433;Initial Catalog=sqldb-name;User Id=dbuser;Password=b2CZ45?DOWNwJYR;Trusted_Connection=False;Encrypt=True;Connection Timeout=30;MultipleActiveResultSets=True"
     }
}
Don't forget to change the connectionstring so that it points to your Optimizely CMS database.
Now we have created a folder where we have minimal structure and simply can just change the connection string and run the CLI many times.
Adding a reference file
Let also create a readme file in the folder where we can add information and script snippets.
New-Item readme.txt
code readme.txt
Store some examples in the readme file so it is easy next time you are going to create an admin user.
dotnet-episerver add-admin-user -u test.testsson2 -p P@ssw0rd -e test2@epinova.se -c EPiServerDB C:\dev\CreateCmsAdminUser\Site.csproj
It could be also good to know that you can execute many rows at once. If you would take the next code example you would be able to paste it to the PowerShell terminal and just push enter, all of the users would be created in the database specified in the appSettings.json file.
dotnet-episerver add-admin-user -u test.testsson1 -p P@ssw0rd -e test1@epinova.se -c EPiServerDB C:\dev\CreateCmsAdminUser\Site.csproj
dotnet-episerver add-admin-user -u test.testsson2 -p P@ssw0rd -e test2@epinova.se -c EPiServerDB C:\dev\CreateCmsAdminUser\Site.csproj
dotnet-episerver add-admin-user -u test.testsson3 -p P@ssw0rd -e test3@epinova.se -c EPiServerDB C:\dev\CreateCmsAdminUser\Site.csproj
Here is an example what you can write in your readme.txt file:
# How to create Optimizely CMS admin user.


# Check/Change the database connectionstring in c:\dev\CreateCmsAdminUser\appSettings.json
# make sure that it points to the database you want to create the user in.
# Open PowerShell terminal and go to (this) folder
cd c:\dev\CreateCmsAdminUser

# Take a copy of the script below and change it to your choice.
dotnet-episerver add-admin-user -u adminuser -p P@ssw0rd -e adminuser@somewhere.com -c EPiServerDB C:\dev\CreateCmsAdminUser\Site.csproj

# You can execute many rows at once.
dotnet-episerver add-admin-user -u adminuser -p P@ssw0rd -e adminuser@somewhere.com -c EPiServerDB C:\dev\CreateCmsAdminUser\Site.csproj
dotnet-episerver add-admin-user -u adminuser2 -p P@ssw0rd -e adminuser2@somewhere.com -c EPiServerDB C:\dev\CreateCmsAdminUser\Site.csproj
dotnet-episerver add-admin-user -u adminuser3 -p P@ssw0rd -e adminuser3@somewhere.com -c EPiServerDB C:\dev\CreateCmsAdminUser\Site.csproj
Errors
Sometimes you will bump into an error 😊. “I know… strange”. One that I bump into a lot is that I have forgotten to open up the firewall in Windows Azure for the database I want to connect to. This is an example of how it could look like.

“Cannot open server ‘beep’ requested by the login. Client with IP address ‘beep’ is not allowed to access the server.“
Firewall configuration: https://learn.microsoft.com/en-us/azure/azure-sql/database/firewall-configure?view=azuresql
Outro
I hope that this helped, and I hope that it would take much less energy to generate/create admin users the next time you need to do that.
Sources
I have learned everything I know about Optimizely Data CLI from the following 2 links. Thanks Erik Herlitz!
https://www.herlitz.io/2022/05/03/optimizely-cms-12-cli-tools-getting-started/
https://www.herlitz.io/2022/06/creating-a-new-cms-database-using-the-optimizely-cli/

Vi vill gärna höra vad du tycker om inlägget